
Primus SP10/SD10 installation guide (No coin drop)
Recommended dashboard setup

Primus SP10/SD10
Fixed ➜ Pulse operated
Pulse length: 100 ms., pulse repetition: 1, busy signal: Low in use
Recommended machine setup
As per the machine guides recommendations
When programming the machine you have to disconnect the jumper between H11-2 and H11-11 to enter manual programming mode - and then click the correct combination of buttons on the display.
Example:
OPL 1/2/3 = off
Pulse = 1.00
Price = 1.00
Den1 = 1.00
Den2 = 1.00
The actual price of the machine is going to be set from the Airwallet Dashboard - The important thing is to make sure that it is possible to start the machine, when it recieves the payment pulse.
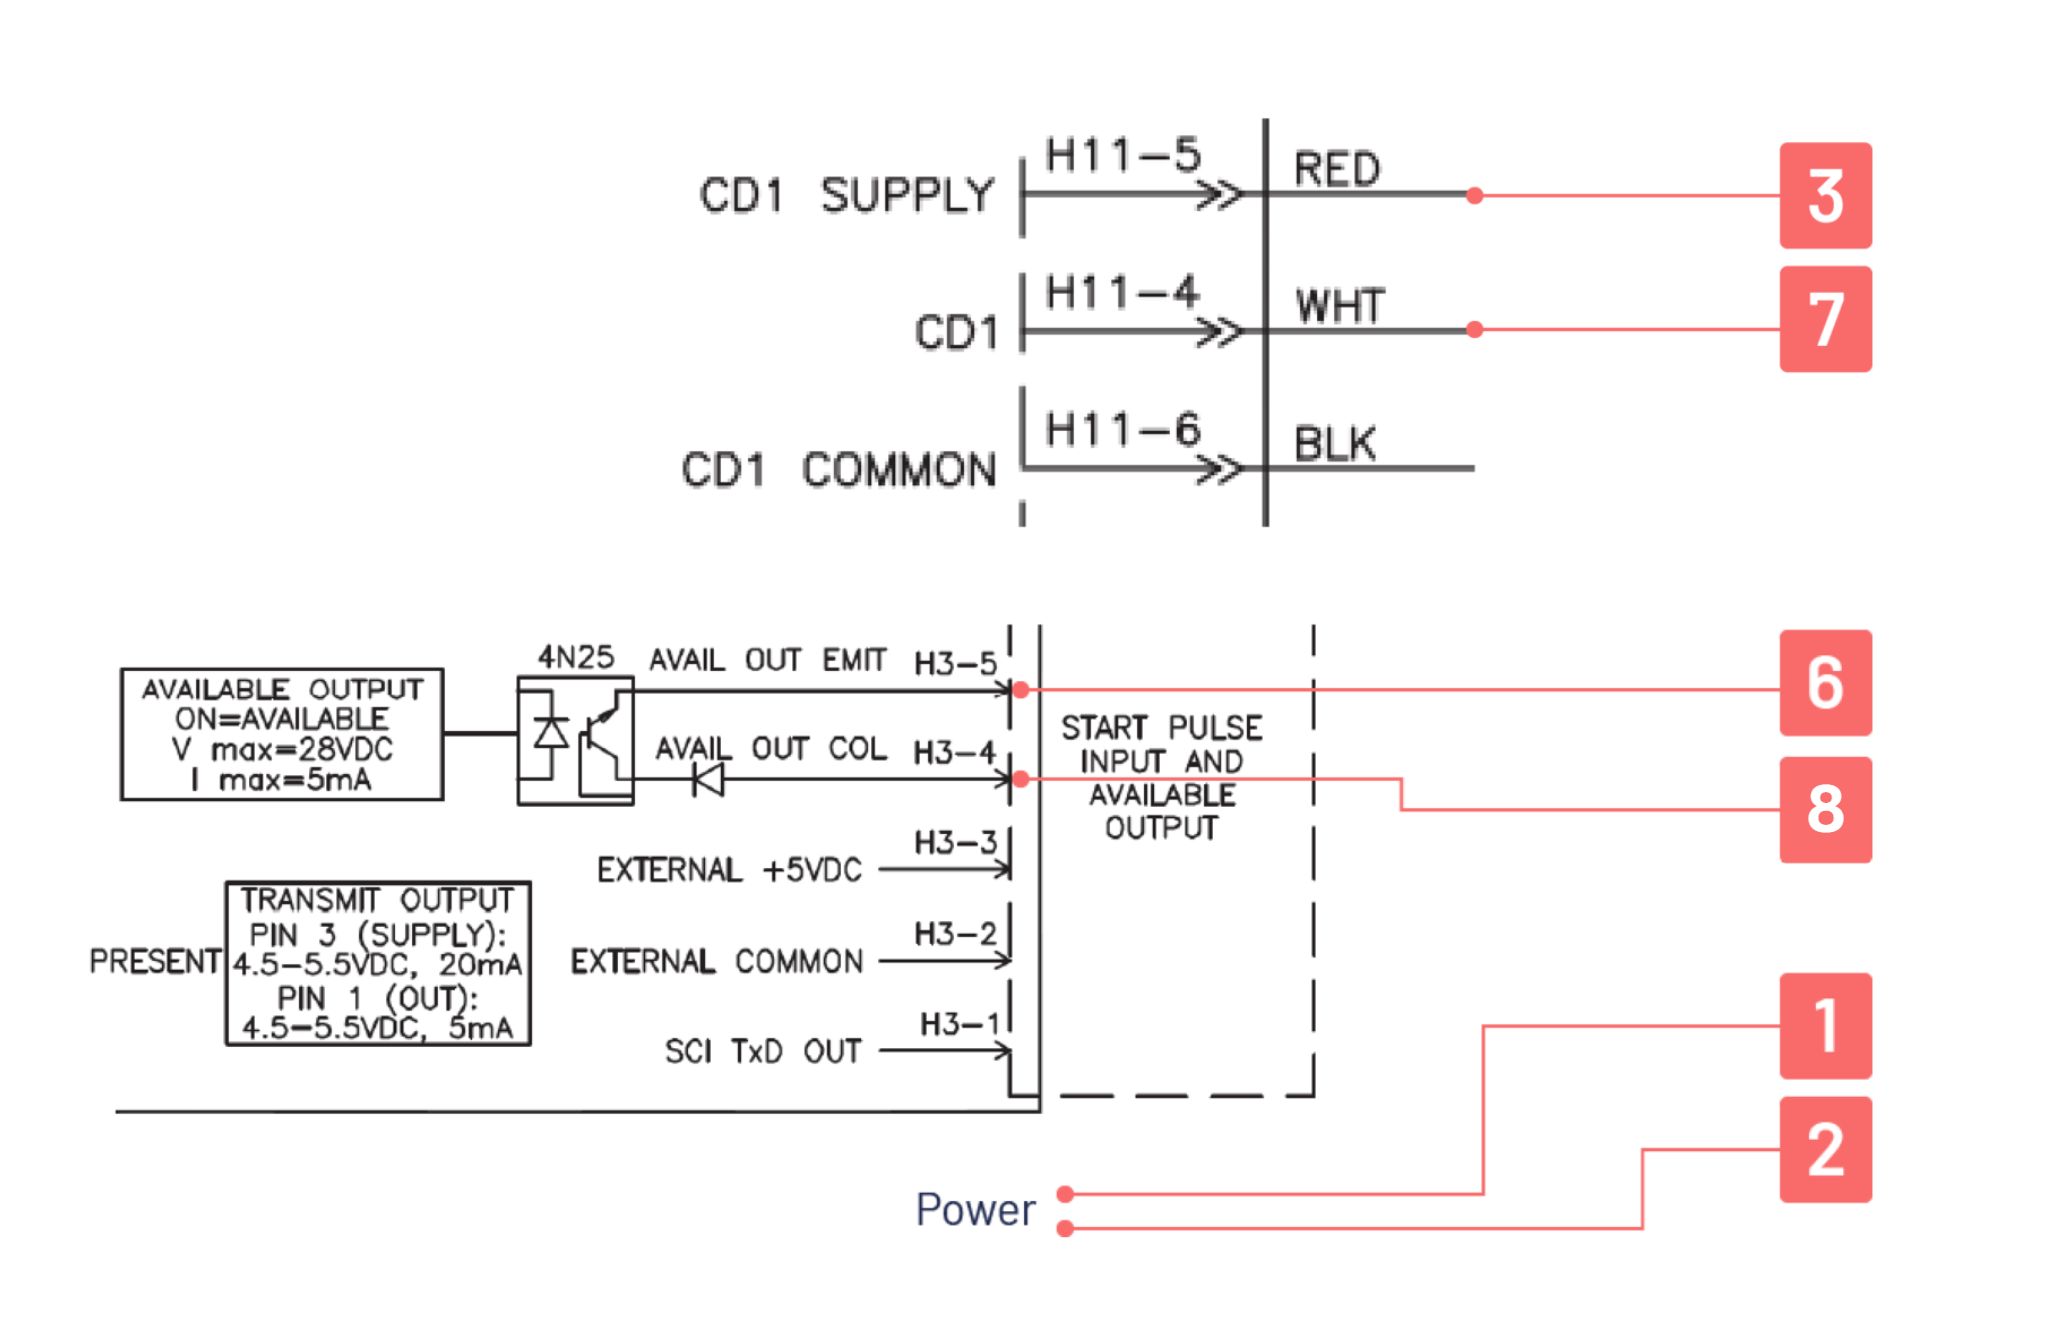
Wiring diagram
No. | AW PRO340 or higher | Wiring diagram |
|---|---|---|
1 | Wire no. 1 | Line |
2 | Wire no. 2 | Neutral |
3 | Wire no. 3 | Terminal H11-5 |
4 | Wire no. 4 | Not in use |
5 | Wire no. 5 | Not in use |
6 | Wire no. 6 | Terminal H3-5 |
7 | Wire no. 7 | Terminal H11-4 |
8 | Wire no. 8 | Terminal H3-4 |
Note: There has to be 3 jumpers present on the H11 module and dip switch number 3 has to be off.
1. Jumper: H11-1 to H11-3
2. Jumper: H11-2 to H11-11
3. Jumper: H11-10 to H11-12
Updated on: 03/06/2026
Thank you!